It’s always a joy when you get your hands on a brand new computer or upgrade to a new cutting edge OS. But it also means the hassle of downloading individual software and installing them one by one. If you’re like me and use all types of software, this process of clicking next-next-next on installation wizards could take hours. But fret not, there’s an app that lets you bulk-install applications which I discovered years ago. It’s called Ninite.
In a nutshell, Ninite consolidates the most popular free applications and lets you download it in a single installer file. This saves you time and effort from the traditional way of downloading and installing one by one.
So how does Ninite work? It’s really super duper simple.
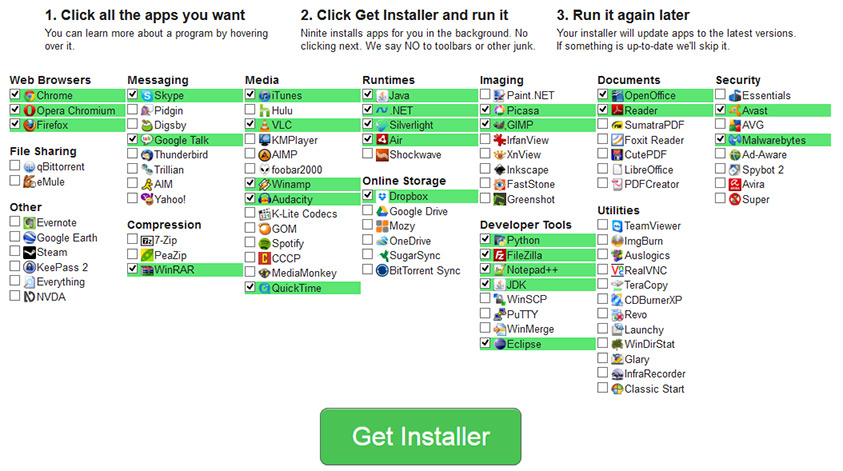
Step 1: Select all the apps you want and click ‘Get Installer‘
(*Note: If you’re clueless about which to select, scroll to the bottom of the post where I will recommend my fav apps)
Step 2: Download the file
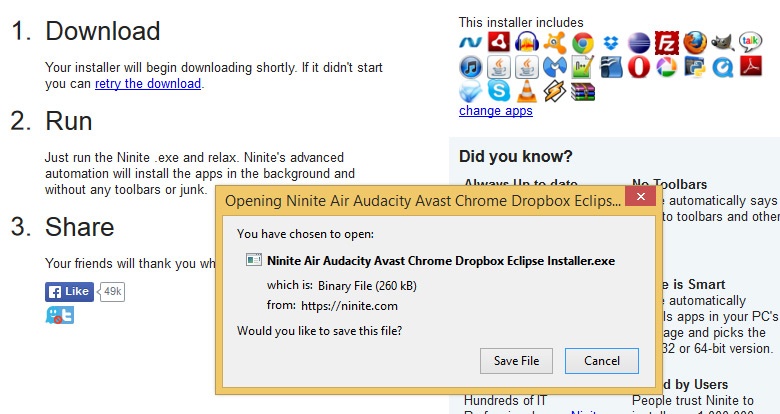
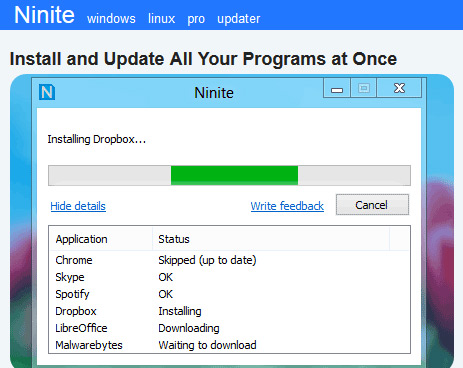
Step 3: Run the file, sit back and let the magic unfold.
Perhaps you could go have a shower, and when you’re back, everything will be installed. It’s really that simple!
At the moment, Ninite supports Windows and Linux. I’ve been searching for a Ninite equivalent for Mac OS, but to no avail. So yes, Windows and Ubuntu users, you are one lucky bunch of people!
The official website for Ninite is http://www.ninite.com
Additional Information: Apps that I personally use and recommend
WEB BROWSERS:
- Chrome (ease-of-use, speed, extensions),
- Firefox (access to ton of add-ons, personal privacy and away from pryng eyes of Google),
- Opera (Opera was once the king of speed & usability in the early and mid 2000s before Google introduced Chrome in 2008)
MESSAGING: Skype, Google Talk
COMPRESSION: Winrar
MEDIA
- iTunes (for Mac devices)
- VLC (the best free video and multimedia player in the market)
- Winamp (I’ve been using Winamp since 1999 and still love it because it uses the least memory & system resources, compared to any other music player the past 15 years)
- Audacity (the best free open-source music editor software for recording , editing, mixing)
- K-Lite Codecs (all the necessary video codecs you ever need to run your videos smoothly)
RUNTIME: Java, NET, Silverlight, Air
ONLINE STORAGE: Dropbox, Google Drive
IMAGING
- Picasa (The most intuitive, easy-to-use application for organizing, editing your photos.You can easily favourite photos by “Starring” them by pressing the space button. Then, easily select these Starred photos and directly upload to Facebook or other social media. For Photoshop-phobic people, Picasa has a host of easy-to-use picture editing features extremely simple and if you’re lazy, you would probably love “I’m Feeling Lucky” edit feature that is a one-click fix for your image lighting and colour. Lastly, I also like the Export function that lets you select one or more pictures, easily bulk-resize them or add watermark captions all at once)
- GIMP (the best open-source alternative to Adobe Photoshop)
DOCUMENTS:
- OpenOffice (open-source alternative to Microsoft Office),
- Reader (to read PDF files)
SECURITY
- Avast (reliable & light on system resources) ,
- MalWareBytes (effective malware, rootkit protection)
DEVELOPER TOOLS
- Python,
- FileZilla (for web developers who use WS FTP),
- Notepad++,
- JDK,
- Eclipse (for Android development)
These are the applications that I have been using for many years. If you’re not a developer, you can ignore the ‘Developer Tools’ section, but definitely consider downloading all the others that I suggested.
And that’s all for the 2nd post of Tech Kung Fu. Hope you enjoyed today’s killer tip and feel free to share. Chop by chop, you’re on your way to becoming a kung fu tech master!